


Creating a Personal Site with Netlify CMS and Eleventy
Creation Date
Jan 30, 2021
Tags
Netlify
Headless CMS
Eleventy
JavaScript
Introduction
One of my recent side projects was to make a personal website that I can use to showcase my future and past projects; however I always like to learn new things in each of my side projects so I also wanted to try out somethings that I never really tried before; I decided to try a combination of Netlify CMS and Eleventy after giving this story/tutorial by Sebastian Eschweiler a read:
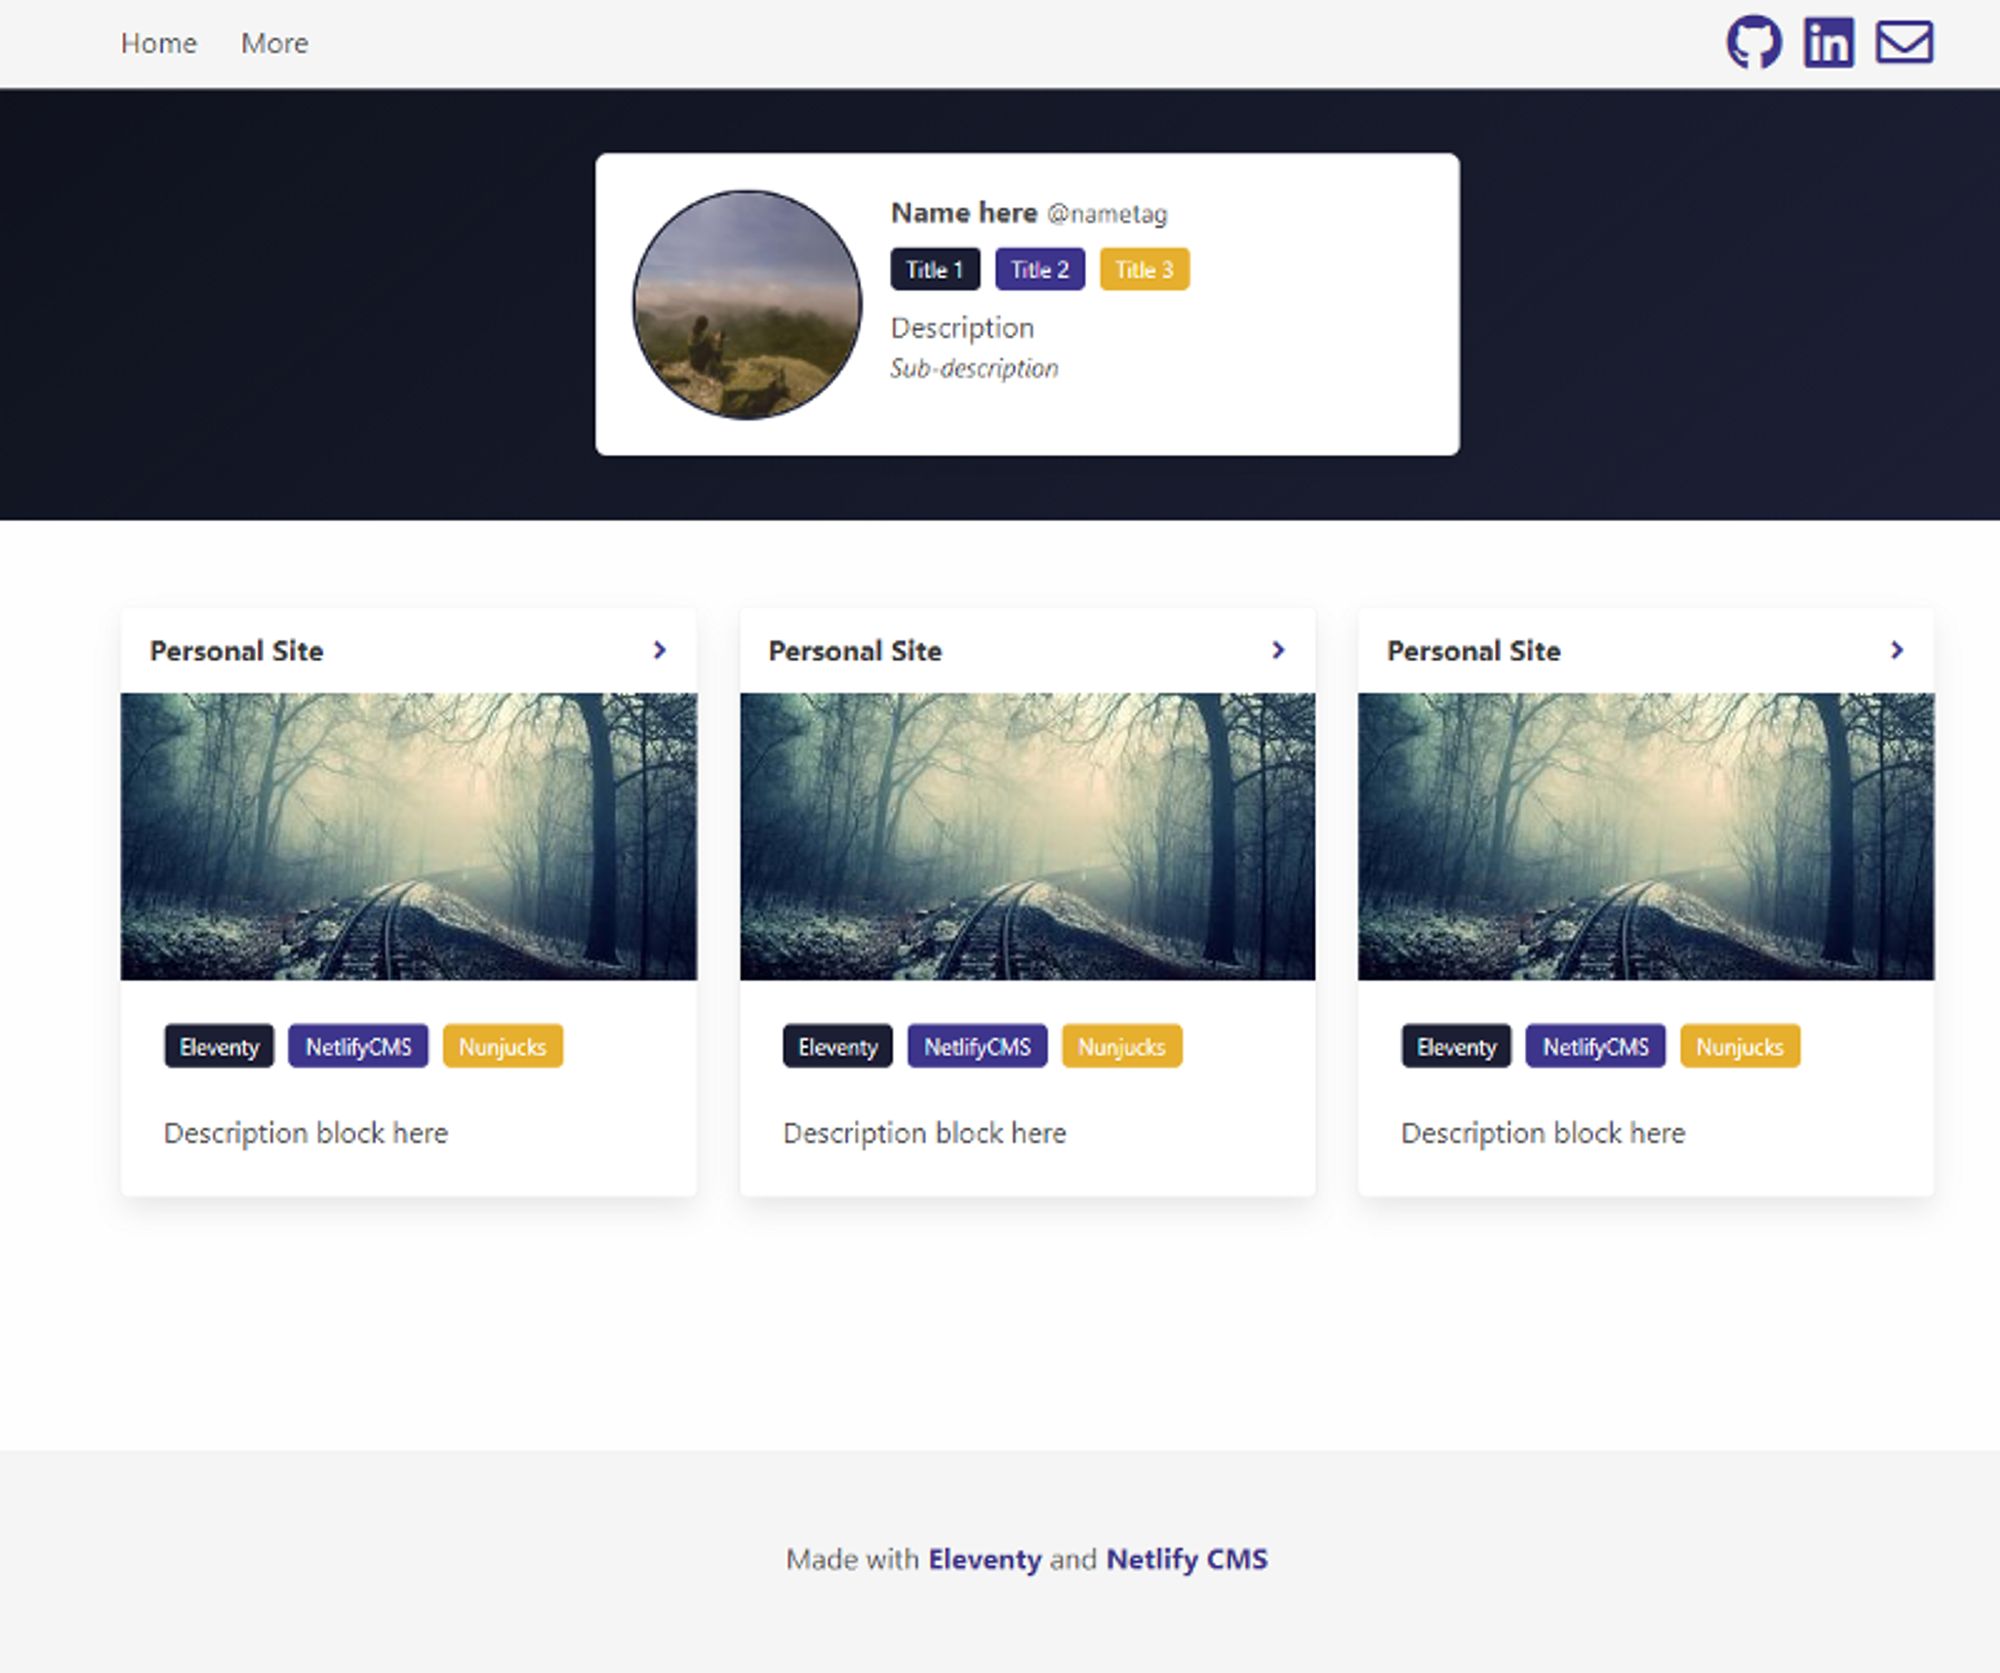
I used Sebastian's project as a starting point but I quickly realized I can expand on his implementation and make a much more customizable site beyond just a blog. I developed a new version that lets the admin/creator easily add new 'componentized' blocks to the site whether it be a collection of side projects or a collection of new pages. Here is the template for the personal site creator:
I used the following libraries to generate the static site in case anyone is interested in documentation to modify the template above:
- Nunjucks: Templating engine https://mozilla.github.io/nunjucks/
- Eleventy: Static site generator https://www.11ty.dev/
- Sass: For styling https://sass-lang.com/
- Bulma: For a CSS framework https://bulma.io/
How It Works
Folder Structure
“_data” serves as the “database” that houses all our settings and page content. Each json in this folder can be accessed by our Nunjucks templating engine directly.
“_includes/layouts” serves as our base layouts that our dynamic pages (and if you so choose, static pages) use as a basis to render components that are shared between pages. Things like a header, footer, or navbar are typically shared and then the content within the page is what changes.
“components” This folder contains the building blocks of our site: the components (surprise surprise). More specifically, in the sectionComponents sub-directory, the components there will be mapped to NetlifyCMS to allow us to configure the content on pages.
“pages” This folder lets eleventy compile our routing appropriately and maps each page to a sectionGroupList which is what determines the content that will appear on the page.
“admin” Our admin page is copied directly to our compiled site and lets Netlify CMS manage the content of our page.
The rest of the folders are mostly reserved for assets and are copied over directly.
Netlify CMS
To give an idea of how things work with Netlify, we can take a look at the admin/config.yml file. Lets look at the “sections” collection which houses are configurable content on our pages.
- name: "sections"
  label: "Sections"
  folder: "_data/sections"
  format: "json"
  create: true
  slug: "{{slug}}"
  identifier_field: sectionGroupName
  fields:
    ...
This will store our section groups in _data/sections which as stated before in the folder structure section, allows our templating engine Nunjucks to access directly.
If we look at the list of fields provided, it gives a bunch of different objects as options. These objects provide the data that builds the content on our pages and they map 1–1 to our components specified in components/sectionComponents. So if we look at the “Projects” option we see the following provided in the yml:
- label: "Projects"
  name: "recentprojects"
  widget: "object"
  fields:
  - label: "Card"
    name: "cardlist"
    widget: "list"
    fields:
    - { label: "Title", name: "title", widget: "string" }
    - { label: "Image", name: "imagelink", widget: "string" }
    - { label: "Link", name: "link", widget: "string" }
    - { label: "Description", name: "description", widget: "string" }
    - label: "Tag"
      name: "taglist"
      widget: "list"
      fields:
      - { label: "Tag Text", name: "tagtext", widget: "string" }
      - { label: "Tag Class", name: "tagclass", widget: "string" }
This will then store the specified data in _data/sections in a sectionGroupList which is just a list of these objects. The data in that file will then be passed down to the mapped components/sectionComponents file (in this case recentprojects.njk) for each added section. We can then access our specified data in the corresponding file using activeComponent
{% for card in activeComponent.cardlist %}
...
{% endfor %}
TLDR
1. Netlify CMS has a list of “Section Groups” that each has a list of various different “sections” that we define.
2. Netlify CMS generates a json that stores the data for our section groups in _data/sections.
3. Eleventy takes the the data in _data/sections and renders the sections in the order they are given.
Deploying
Create an account on https://www.netlify.com/ and create a new site where you link it to your github repository (I recommend having a private repository since you are storing personal site info in the repository itself).
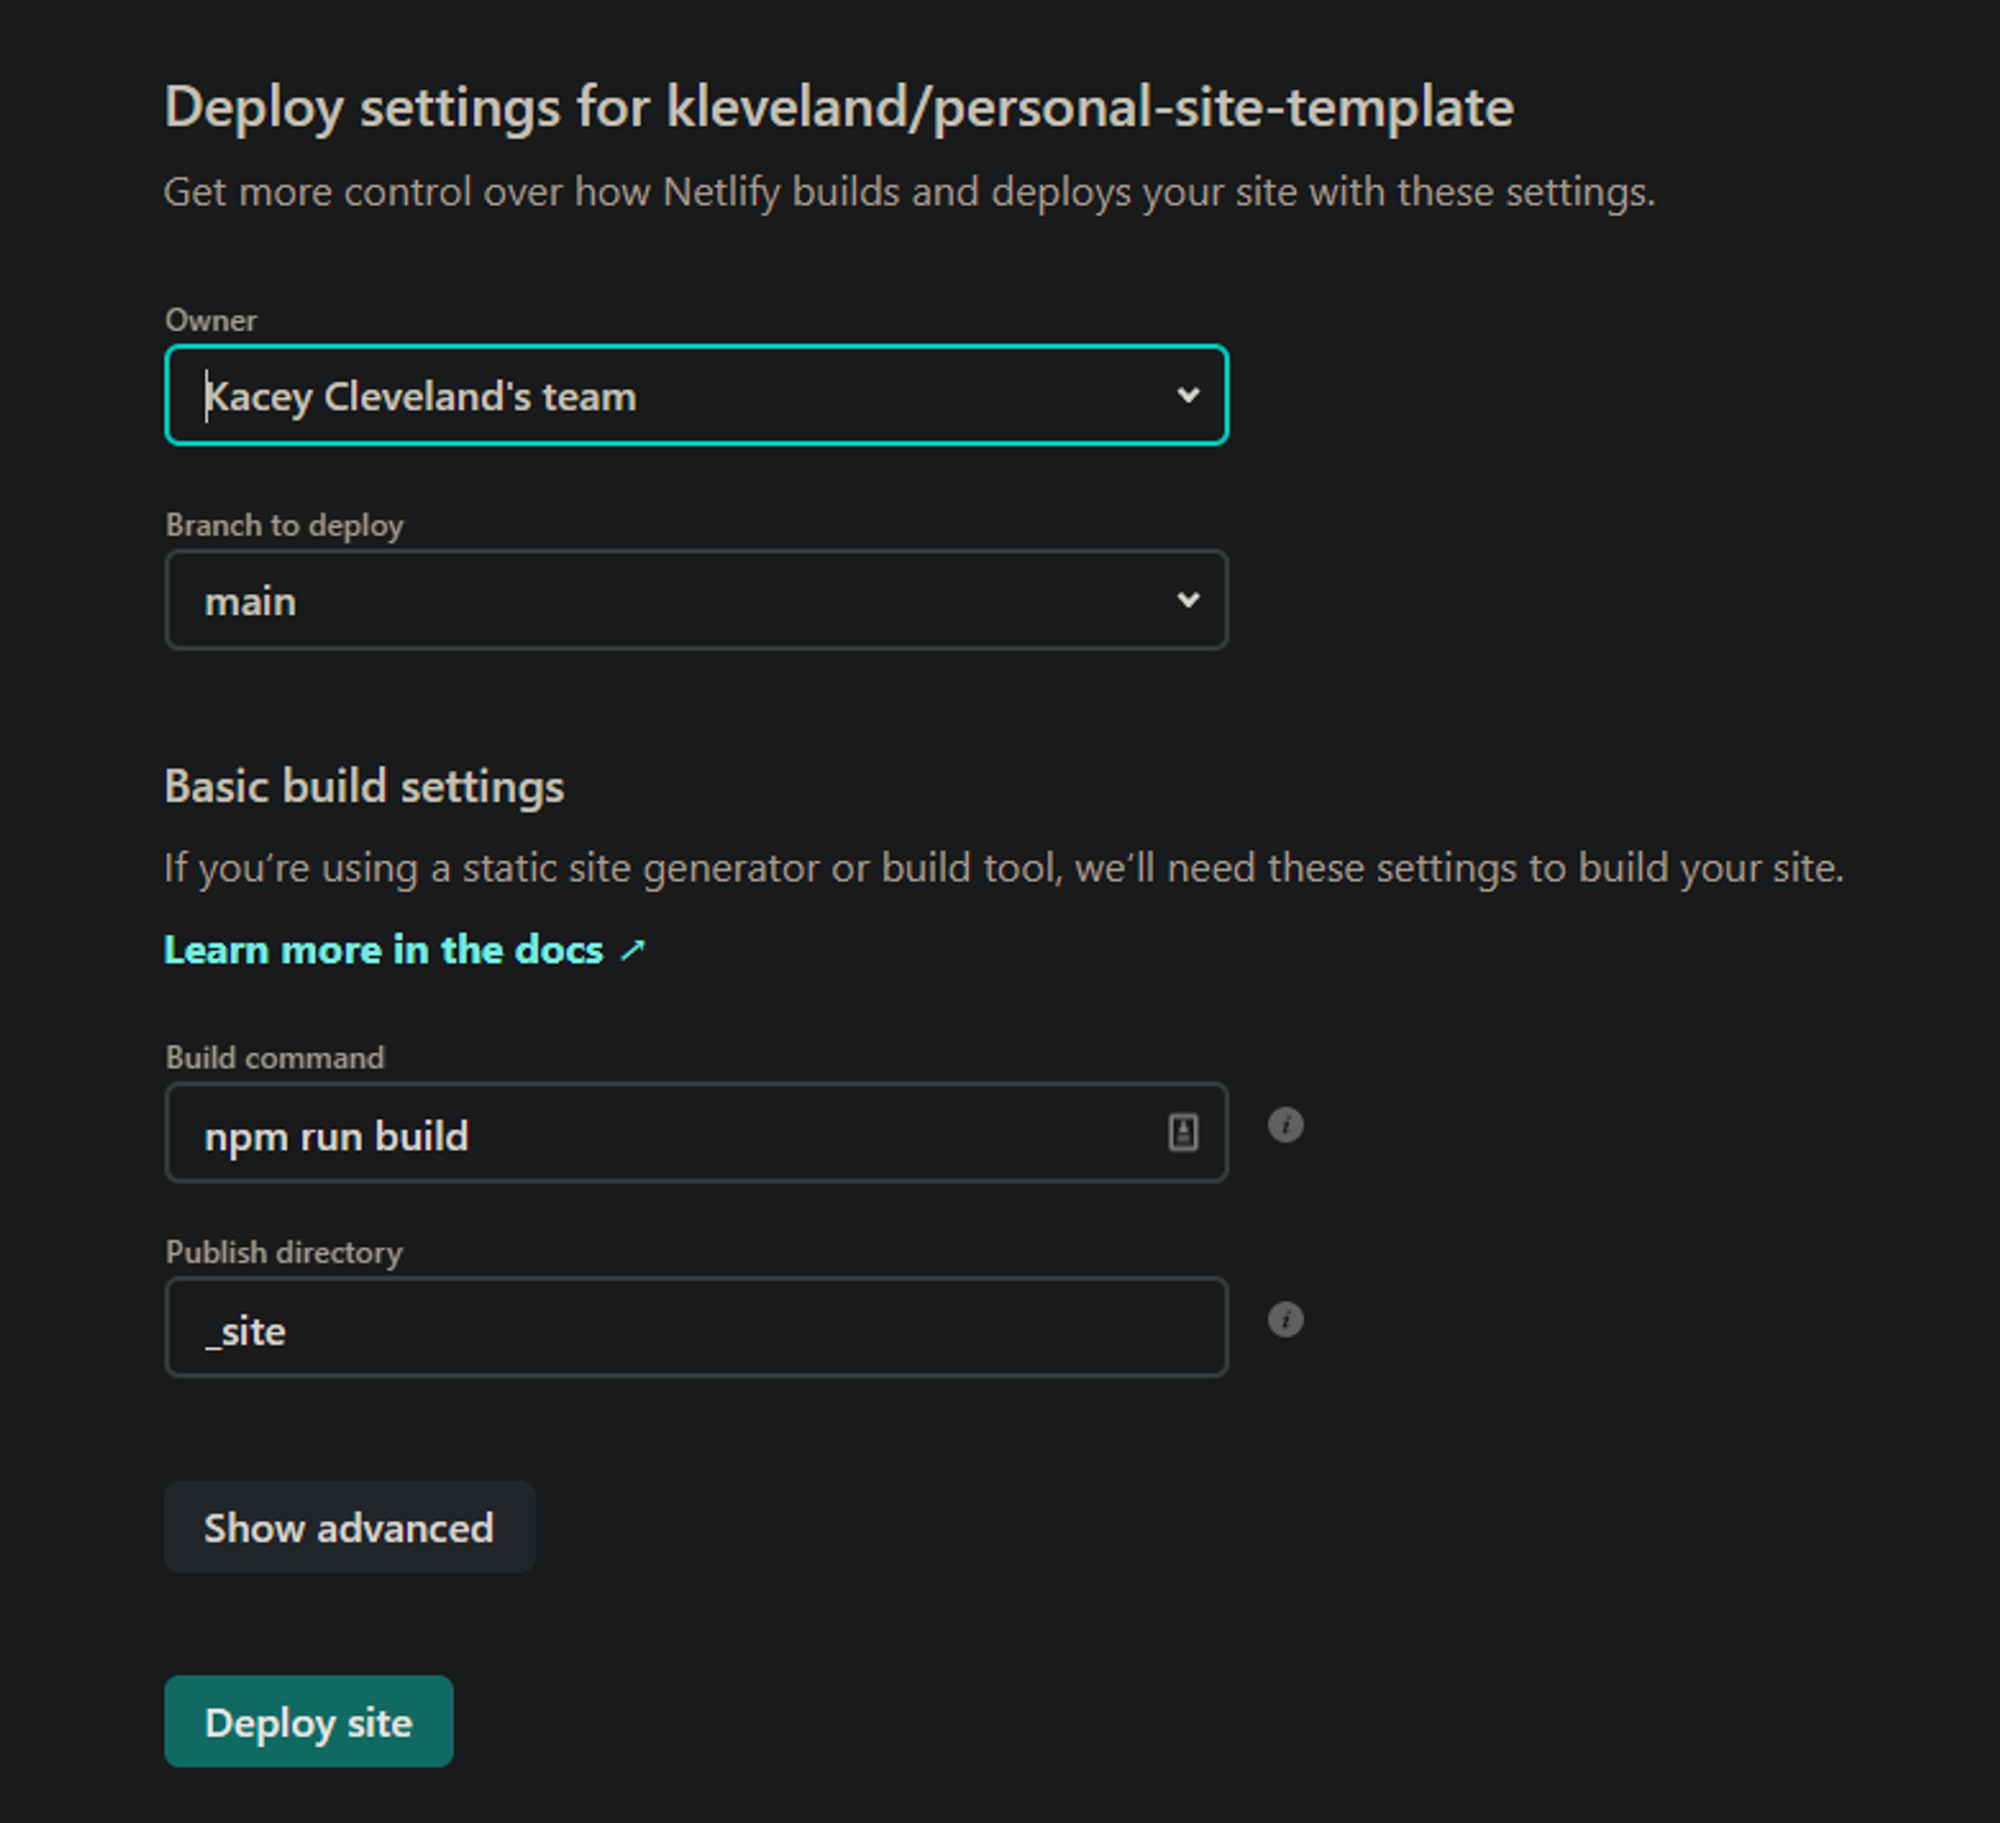
Once linked to a github repository, you can set it up with Netlify like so:
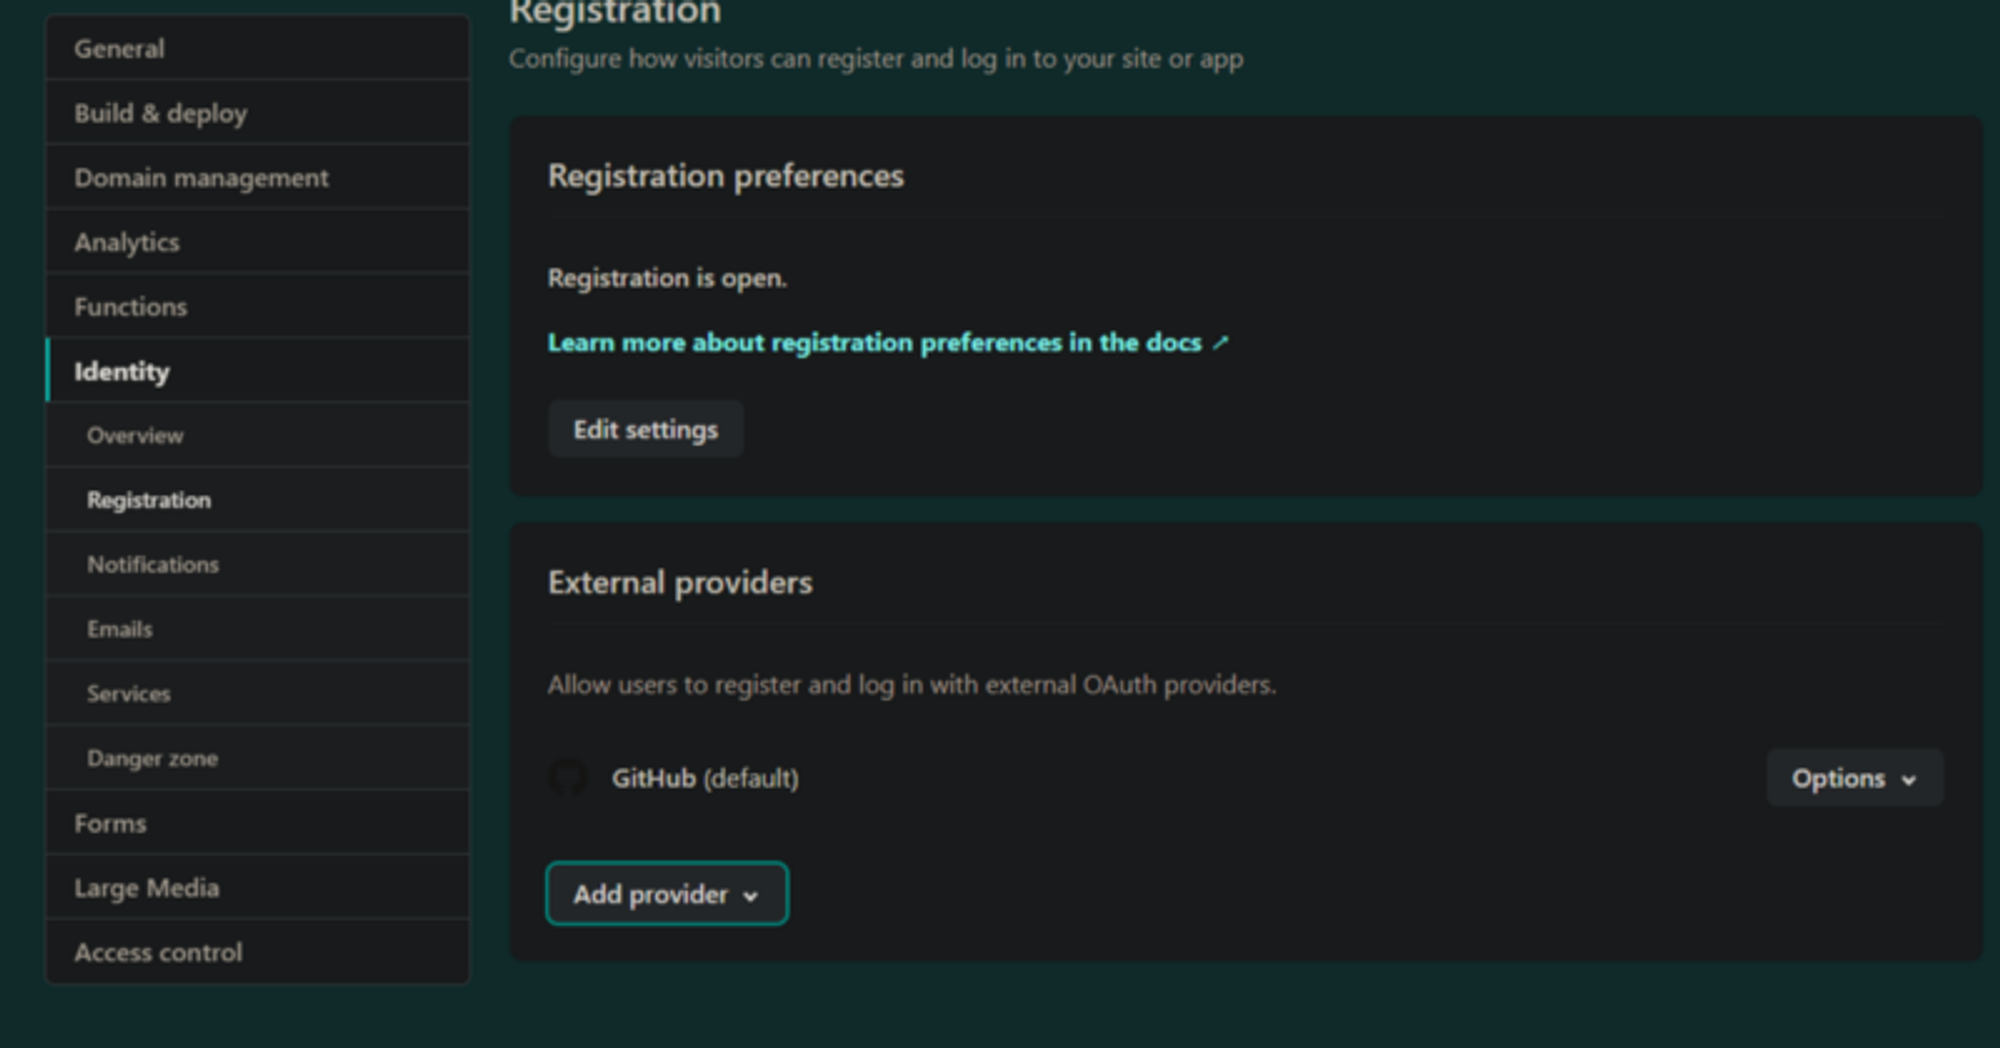
Then you can enable "Identity" in the site's config to authenticate via Github:
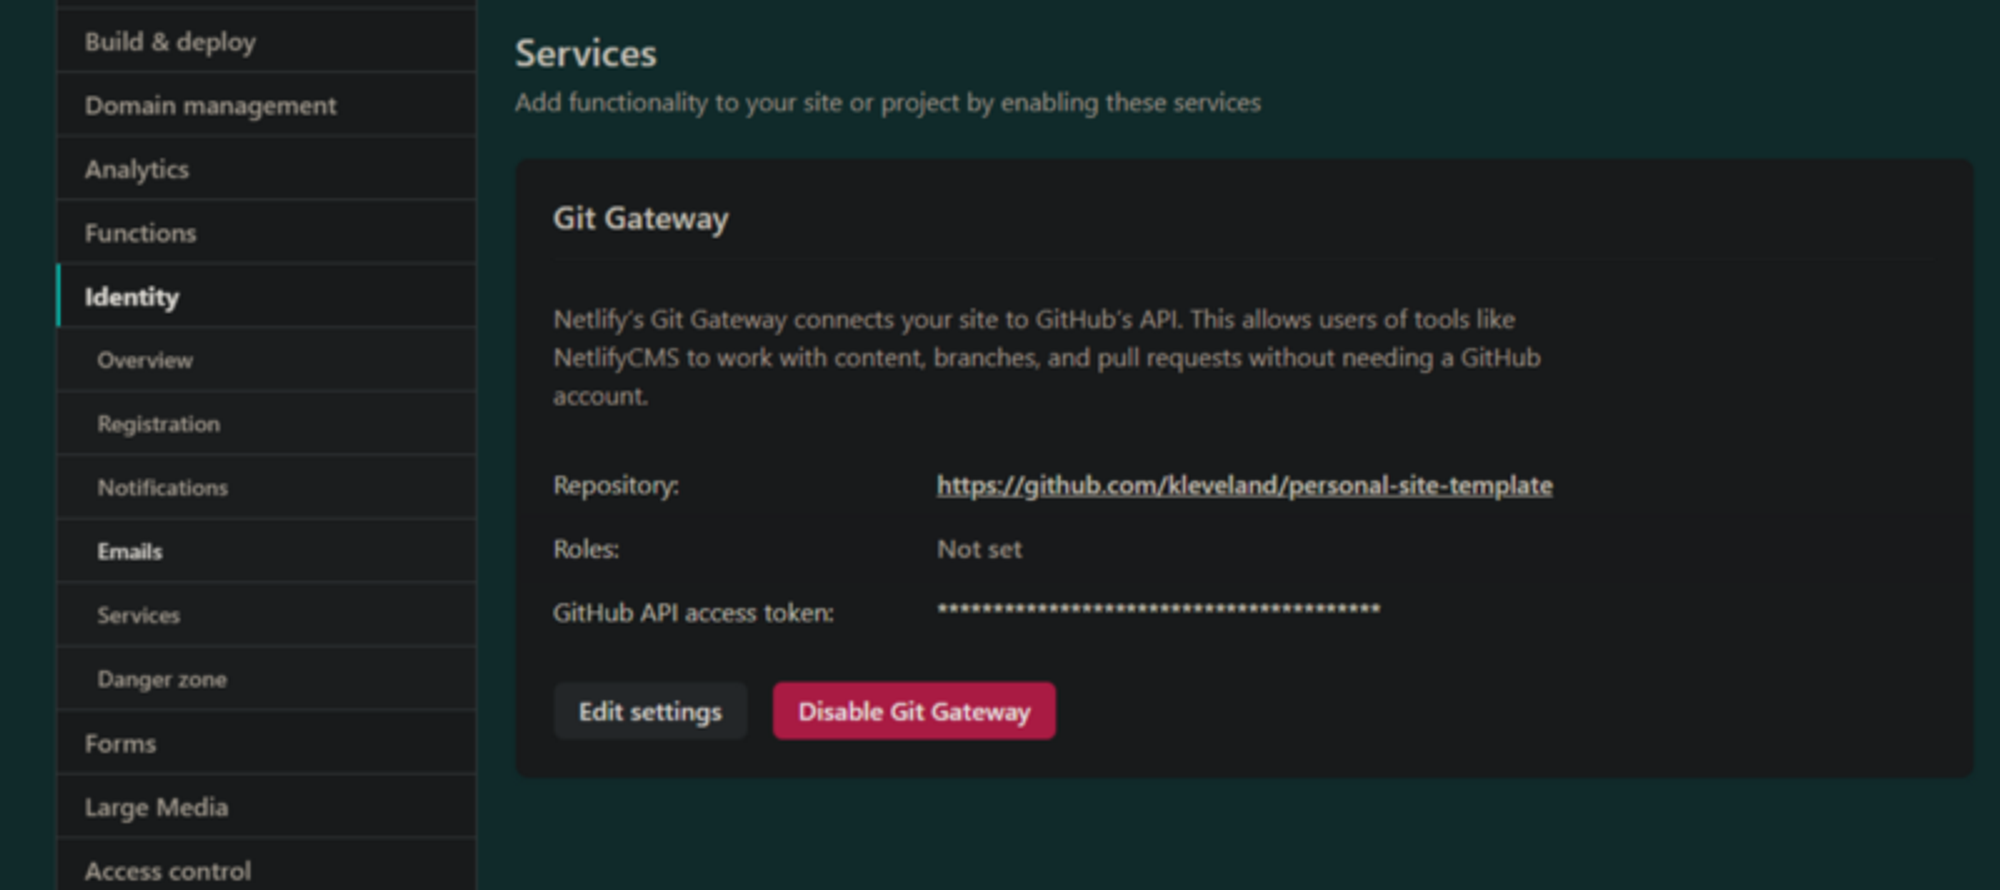
Then enable the git gateway as well:
You should be able to access the site like so:
and manage it via the /admin route
Fin
Now every time you push to your repo, Netlify will automatically start a deploy for you. In addition, every time you edit your content in /admin it will do a deploy as well. Make sure to pull your repo locally whenever you edit content via /admin!
Loading...